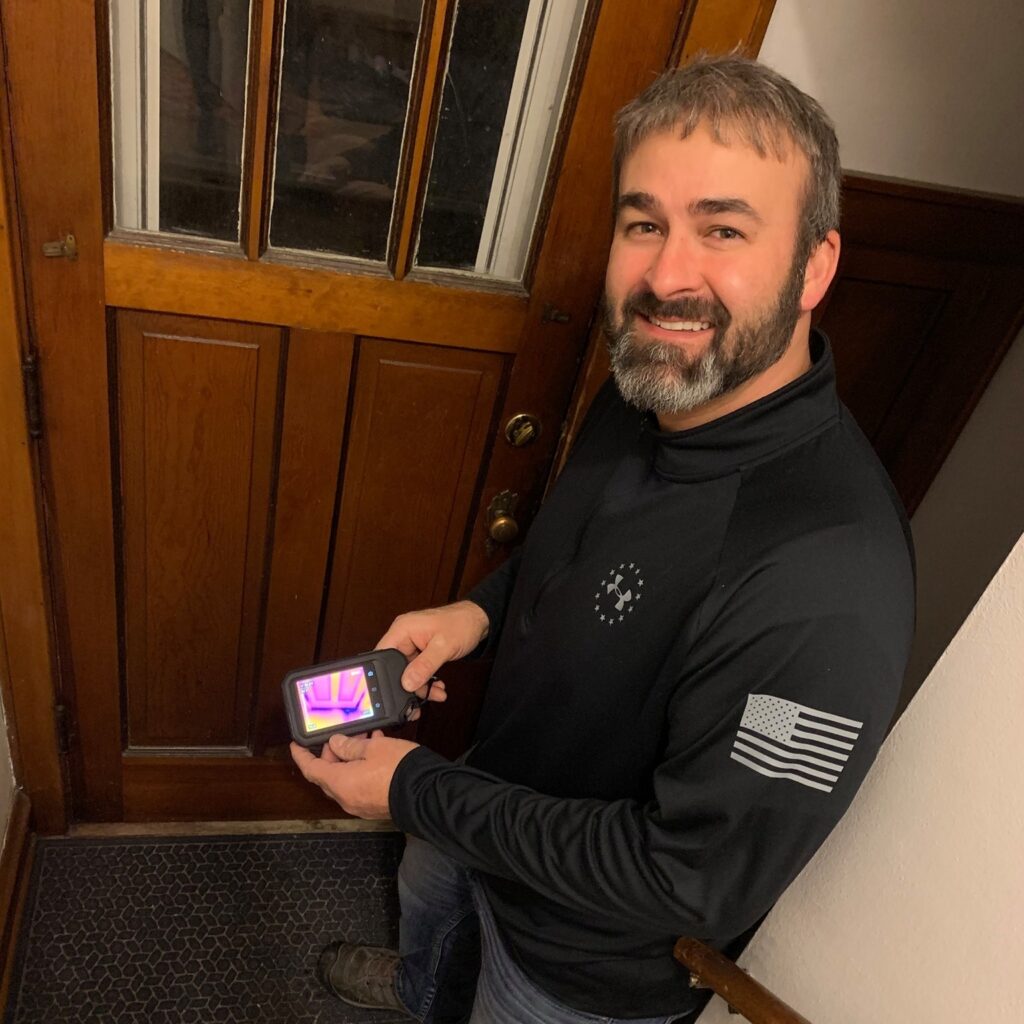
The author, and InterNACHI certified home inspector, using FLIR thermal imaging to locate sub par weather stripping around an exterior door
Hello, I’m Eric Anderson, your home inspector, and I’m glad you could walk along with me during this Waukesha, Wisconsin home inspection. During this mock home inspection, I’ll note deficiencies that I see; I won’t be noting all the items checked as there are too many items to note and I’m guessing you would fall asleep before finishing this article if I did!
We’ll start the home inspection on the outside of the property. It’s important to assess the grade around the building. It’s best if the site is graded with pitch away from the foundation. The first elevation we approach is graded slightly towards the building; I quickly write this down as a deficiency. As we get closer, I notice that the cedar siding is only 1/2″ above the existing grade on the east side of the building. As a rule of the thumb, you want to have between 4″ and 6″ of exposed foundation under your siding. This serves two purposes: first the siding is too close to the grade. The wood siding can wick up water and draw it up into the siding through capillary action. Keeping moisture out of your building materials is imperative to the home’s longevity. Secondly if your foundation has 4″ to 6″ of exposed surface area it will evaporate water faster during drying periods. All building products have a hydric buffer capacity, which is their ability to store water. When a building products maximum hydric buffer capacity is achieved, the building will begin to allow moisture through its layers of defense causing damage to itself and allowing moisture to enter further into interior building products. To put things into perspective a 2000 square foot brick building can absorb 500 gallons of water into the masonry before the hydric buffer capacity is achieved. Wood siding, on the same size building, can only absorb 50 gallons. To summarize, the foundation would evaporate at a faster rate with more exposed concrete in this scenario. Each building envelope presents unique scenarios which makes home inspections so difficult to inexperienced home inspectors. Many more modern building techniques involve waterproofing the exterior of foundations, but we’ll talk about those in future mock home inspections.
As we continue to walk around the home, I notice that 4 out of the 5 down spouts are missing extensions, or the extensions are damaged. It’s important to maintain your home’s ability to expel storm water away from the foundation. Many basements water problems can be solved by simply resolving this deficiency. This is one of the most common problems I see during home inspections. We continue around the patio area, and I test, and confirm, that the GFCI (Ground Fault Circuit Interrupter) located near the patio door is not function properly. It may still provide the proper voltage but without testing, and confirming, it may just be providing a false sense of security. Before GFCI outlets, were introduced, over 800 people died of electrocution in the United States alone. This number has dropped by seventy-five percent since the mandated use of GFCI in all areas within six feet of any water source. Bathrooms, kitchen, garages and our homes exterior should all have GFCI protection.
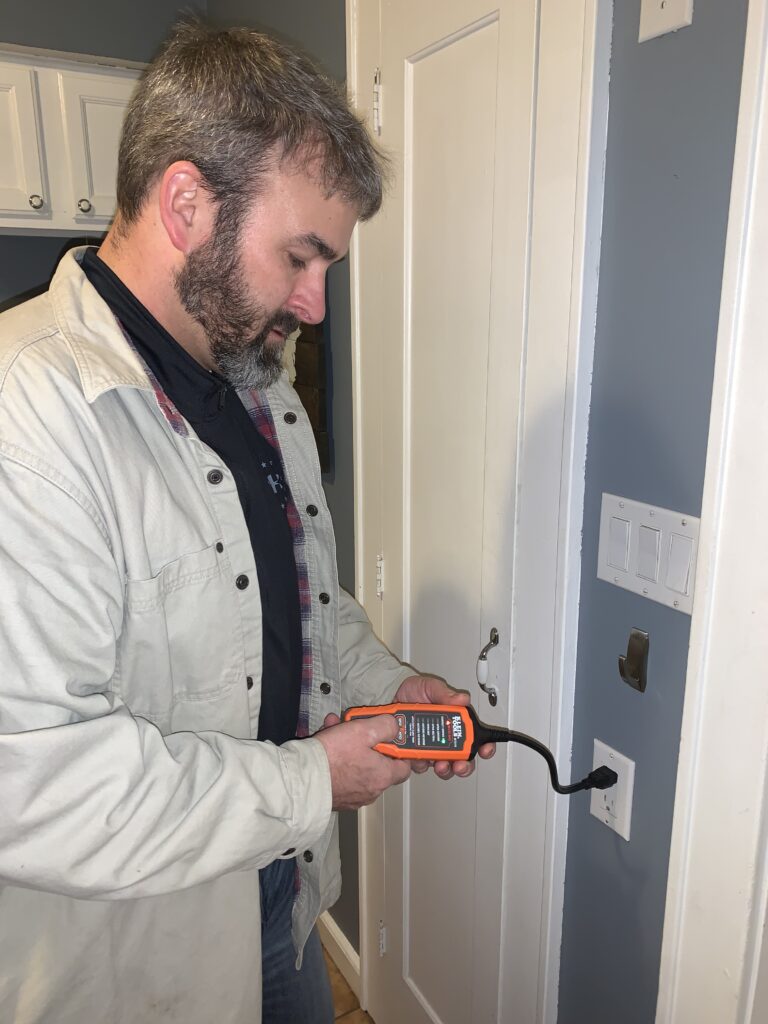
Testing a GFCI outlet and verifying that it trips under load during this Waukesha home inspection
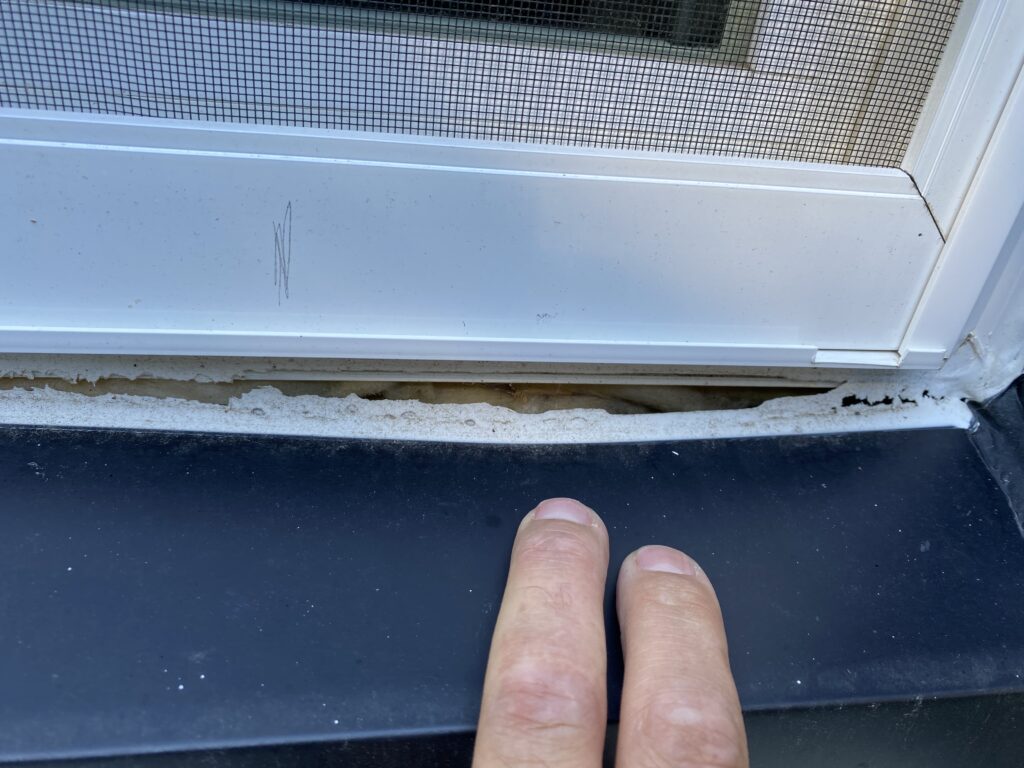
From a distance I notice the installation of replacement windows. The break-metal flashing installed around the perimeter gives them away immediately. As I assess the flashing, I note that the flashing is slightly pitched back towards the window, instead of away. The caulking joint is also loose, and I document this with a picture. Another entry point for moisture discovered during this Waukesha home inspection.
As I walk past the condenser I notice that the line-set’s penetration caulking has gaps. A FLIR thermal imaging shows the possibility of moisture around the penetration. I confirm with a moisture meter and note the deficiency.
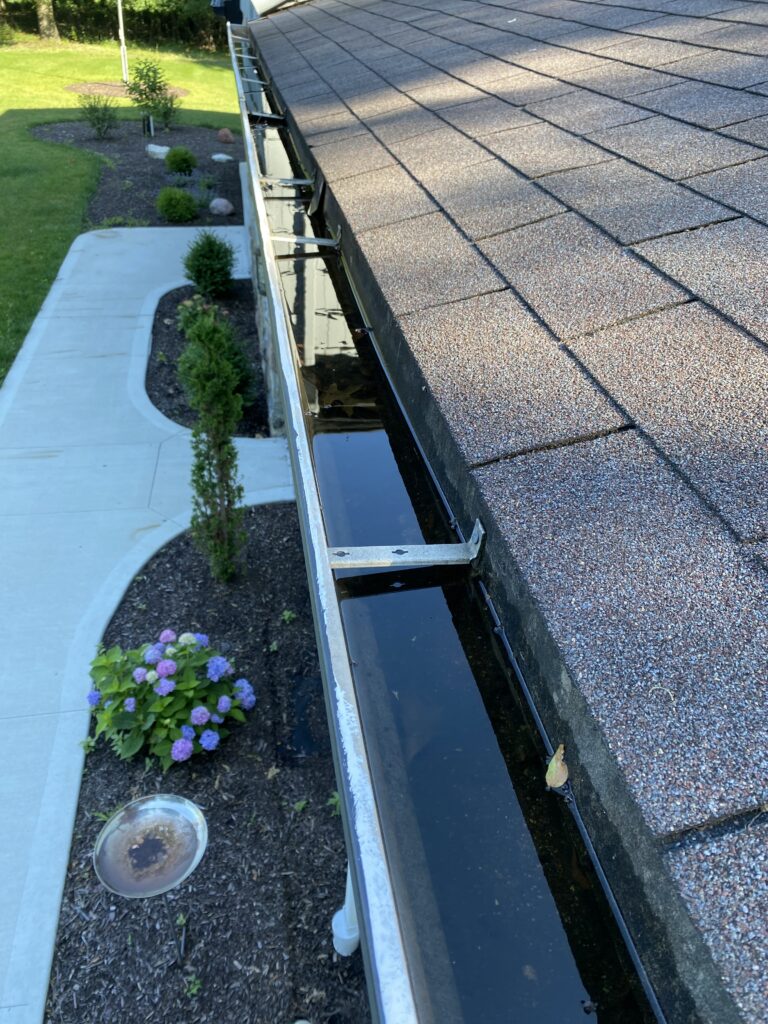
I set a ladder up and climb up onto the asphalt shingles. I note that one of the gutters is holding water, most likely from a clogged downspout. During a rain event the gutter in this area will easily overflow and allow water to pour over and drain to closely to the foundation. This leads to oversaturation of the soils against your foundation which can further cause issues such as hydrostatic water pressure. Hydrostatic water pressure can infiltrate the smallest pin holes in even a waterproofed foundation. Just imagine a bathtub full of water; any pin hole, or crack, is going to release the water in that bathtub through gravity. In the same way, if you had pooling water surrounding your house, it would easily navigate its way into your basement through a hole, a crack, or the hydric buffer capacity of the concrete/masonry foundation was achieved. I can’t stress enough how important it is to get as much storm water at least five feet away from your house as possible.
As I walk closer to the chimney, I note the lack of counterflashing and shingled flashing. I also note several layers of caulk which triggers suspicions of possible water infiltration. Secondly, I note the lack of a roof saddle on the high side of the chimney. Without a properly installed saddle, water is not directed around the chimney and allows water to pond on the high side. Again, I note multiple layers of different colors of caulking. When properly singled flashing and counter flashing are installed along a chimney, and roofline, you will not need caulk, or other sealants, to keep moisture from enter your buildings envelope. Walking near the ridge I notice the exposed roofing nails fastening the hood vents down along the length of the roof. I recommend having a qualified roofing contractor seal all exposed roofing nails with Blackjack waterproof cement roof sealant.
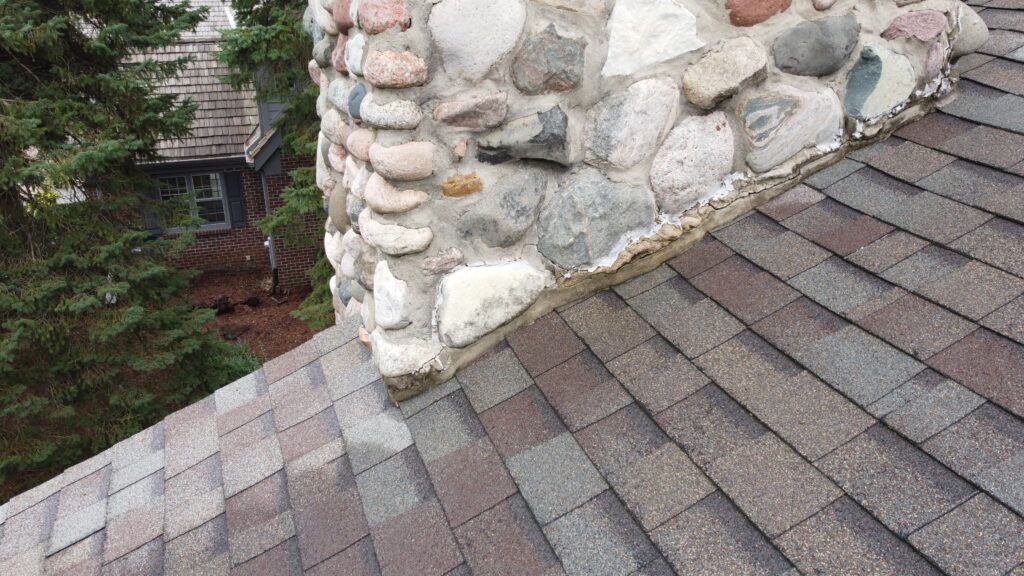
Note the lack of flashing, counterflashing, and saddle
I return to the ladder and climb down returning to the ground and carry the ladder over to another smaller roof covering a kitchen bay window. Immediately upon traversing to the new roof plane I discover incorrectly installed flashing over the asphalt singles. The flashing was incorrectly made in a siding brake. Properly installed flashing should be made with a slightly more obtuse angle than the pitch of the roof line. In the picture below you can see that the flashing was created with a more acute angle which resulted in the contractor using roofing nails to bring the flashing to the same plane as the roof line. Properly installed flashing should only be fastened to the sheathing attached to your exterior studs. Nails should not be used to nail the flashing to the shingles. The flashing should then be covered with counterflashing such as Tyvek, building felt, or Grace Vycor self-adhering flashing. Your wall siding materials should then cover the top half of the flashing which results in the finished product of the exposed lower angle holding tight to your roof angle without the use of nails holding it down. The over bent acute angle will hold the flashing tight without the use of nails.
